Hidden Tags
- List Businesses
- Create Document
- Create Template
- Use Template
- Get Document / Template
- List Documents
- List Templates
- Send Reminder
- Reassign Signer
- Delete Document
- Trash Document / Template
- Cancel Document
- Download Original PDF
- Download Final PDF
- Upload File
- Get Bulk Sending Blank CSV
- Validate Bulk Sending CSV
- Create Bulk Job
- Get Bulk Job by id
- Get Bulk Job Status by id
- Get Bulk Job Documents by id
- Get Bulk Jobs list
- Audit Log
- Errors
Introduction
Hidden tags offer a way of specifying the location of document fields using invisible text tags in the original document before uploading it. One of the several advantages of hidden tags is the ability to place fields without knowing their coordinates, enabling you to skip manually dragging fields within the Xodo Sign web interface, which is especially useful when working with a large number of varying documents and templates.
Enable Hidden Tags:
By default, the Xodo Sign API does not look for hidden tags in your document. In order to enable this feature, add the use_hidden_tags parameter to your API request and set it to 1 when creating a document:
[...]
"sandbox" = 1,
"is_draft" = 0,
"use_hidden_tags" = 1,
"title": "Sample Document",
"use_signer_order": 1,
[...]
When providing a file_id for document creation (see Create Document) be aware that text tags are only parsed when the file is being initially uploaded. To enable text tag parsing for file uploads you can:
Enable the respective business setting under Business Settings → General Preferences → Enable hidden tags
Provide the parameter use_hidden_tags when uploading a file (see Upload File), which will override the business setting:
https://api.eversign.com/file
  ? access_key = YOUR_ACCESS_KEY
  & business_id = 1
  & use_hidden_tags = 1
Usage
A hidden tag is a text element wrapped in square brackets [ ] containing a series of options in a specific order, all divided by | symbols. You can specify a total of 9 options, such as field type, signer ID, required/non-required, field label, field identifier, and more.
White-on-White:
Since hidden tags should in fact be hidden on your document, they should be added in same color as the background of your document. In most cases, this is white-on-white.
Example: Here's a hidden tag using all available options:
[text|req|signer1|Name|name_1|Paul McSign|125|50|letters_only]In the example above we are creating a required 125x50px text field, prefilled with the value "Paul McSign", with "letters_only" field validation enabled. Additionally, the field label is set to "Name" and the field identifier is set to "name_1".
Options: Below you will find all 10 available options explained:
Skipping Options:
In order to skip an option, simply leave it empty without making any changes to the order of other options. A field with a field identifier but without a field label would look like this: [text|req|signer1||name_1|...]
Supported Field Types: The following field types can be created using hidden tags. "Prefill Value" refers to the type of value your field can be prefilled with.
Defining Variables
Complex hidden tags can become very long and confusing if they are placed multiple times. In order to prevent having to copy/paste identical hidden tags, you can define a given hidden tag as a variable and reuse it simply by referencing this tag across your document.
Variables are defined by prepending def: followed by your $variableName.
Example: Below we are defining an email address field as a variable:
[def:$emailTag|req|signer1|Email Address|email_1||150|30|email_address]Our example field above is a required email address field for signer 1, containing "Email Address" as a field label (placeholder), custom dimensions and email validation. This hidden tag can now be reused multiple times simply by referencing $emailTag.
Using a variable: Below we are adding one instance of our $emailTag to the document. Please note that when using variables you can use the 2nd option within the brackets to specify a custom field label an the 3rd option to specify a custom field identifier.
[$emailTag|Custom Field Label|custom_identifier_1]Find below a quick explanation of the custom options available when using variables:
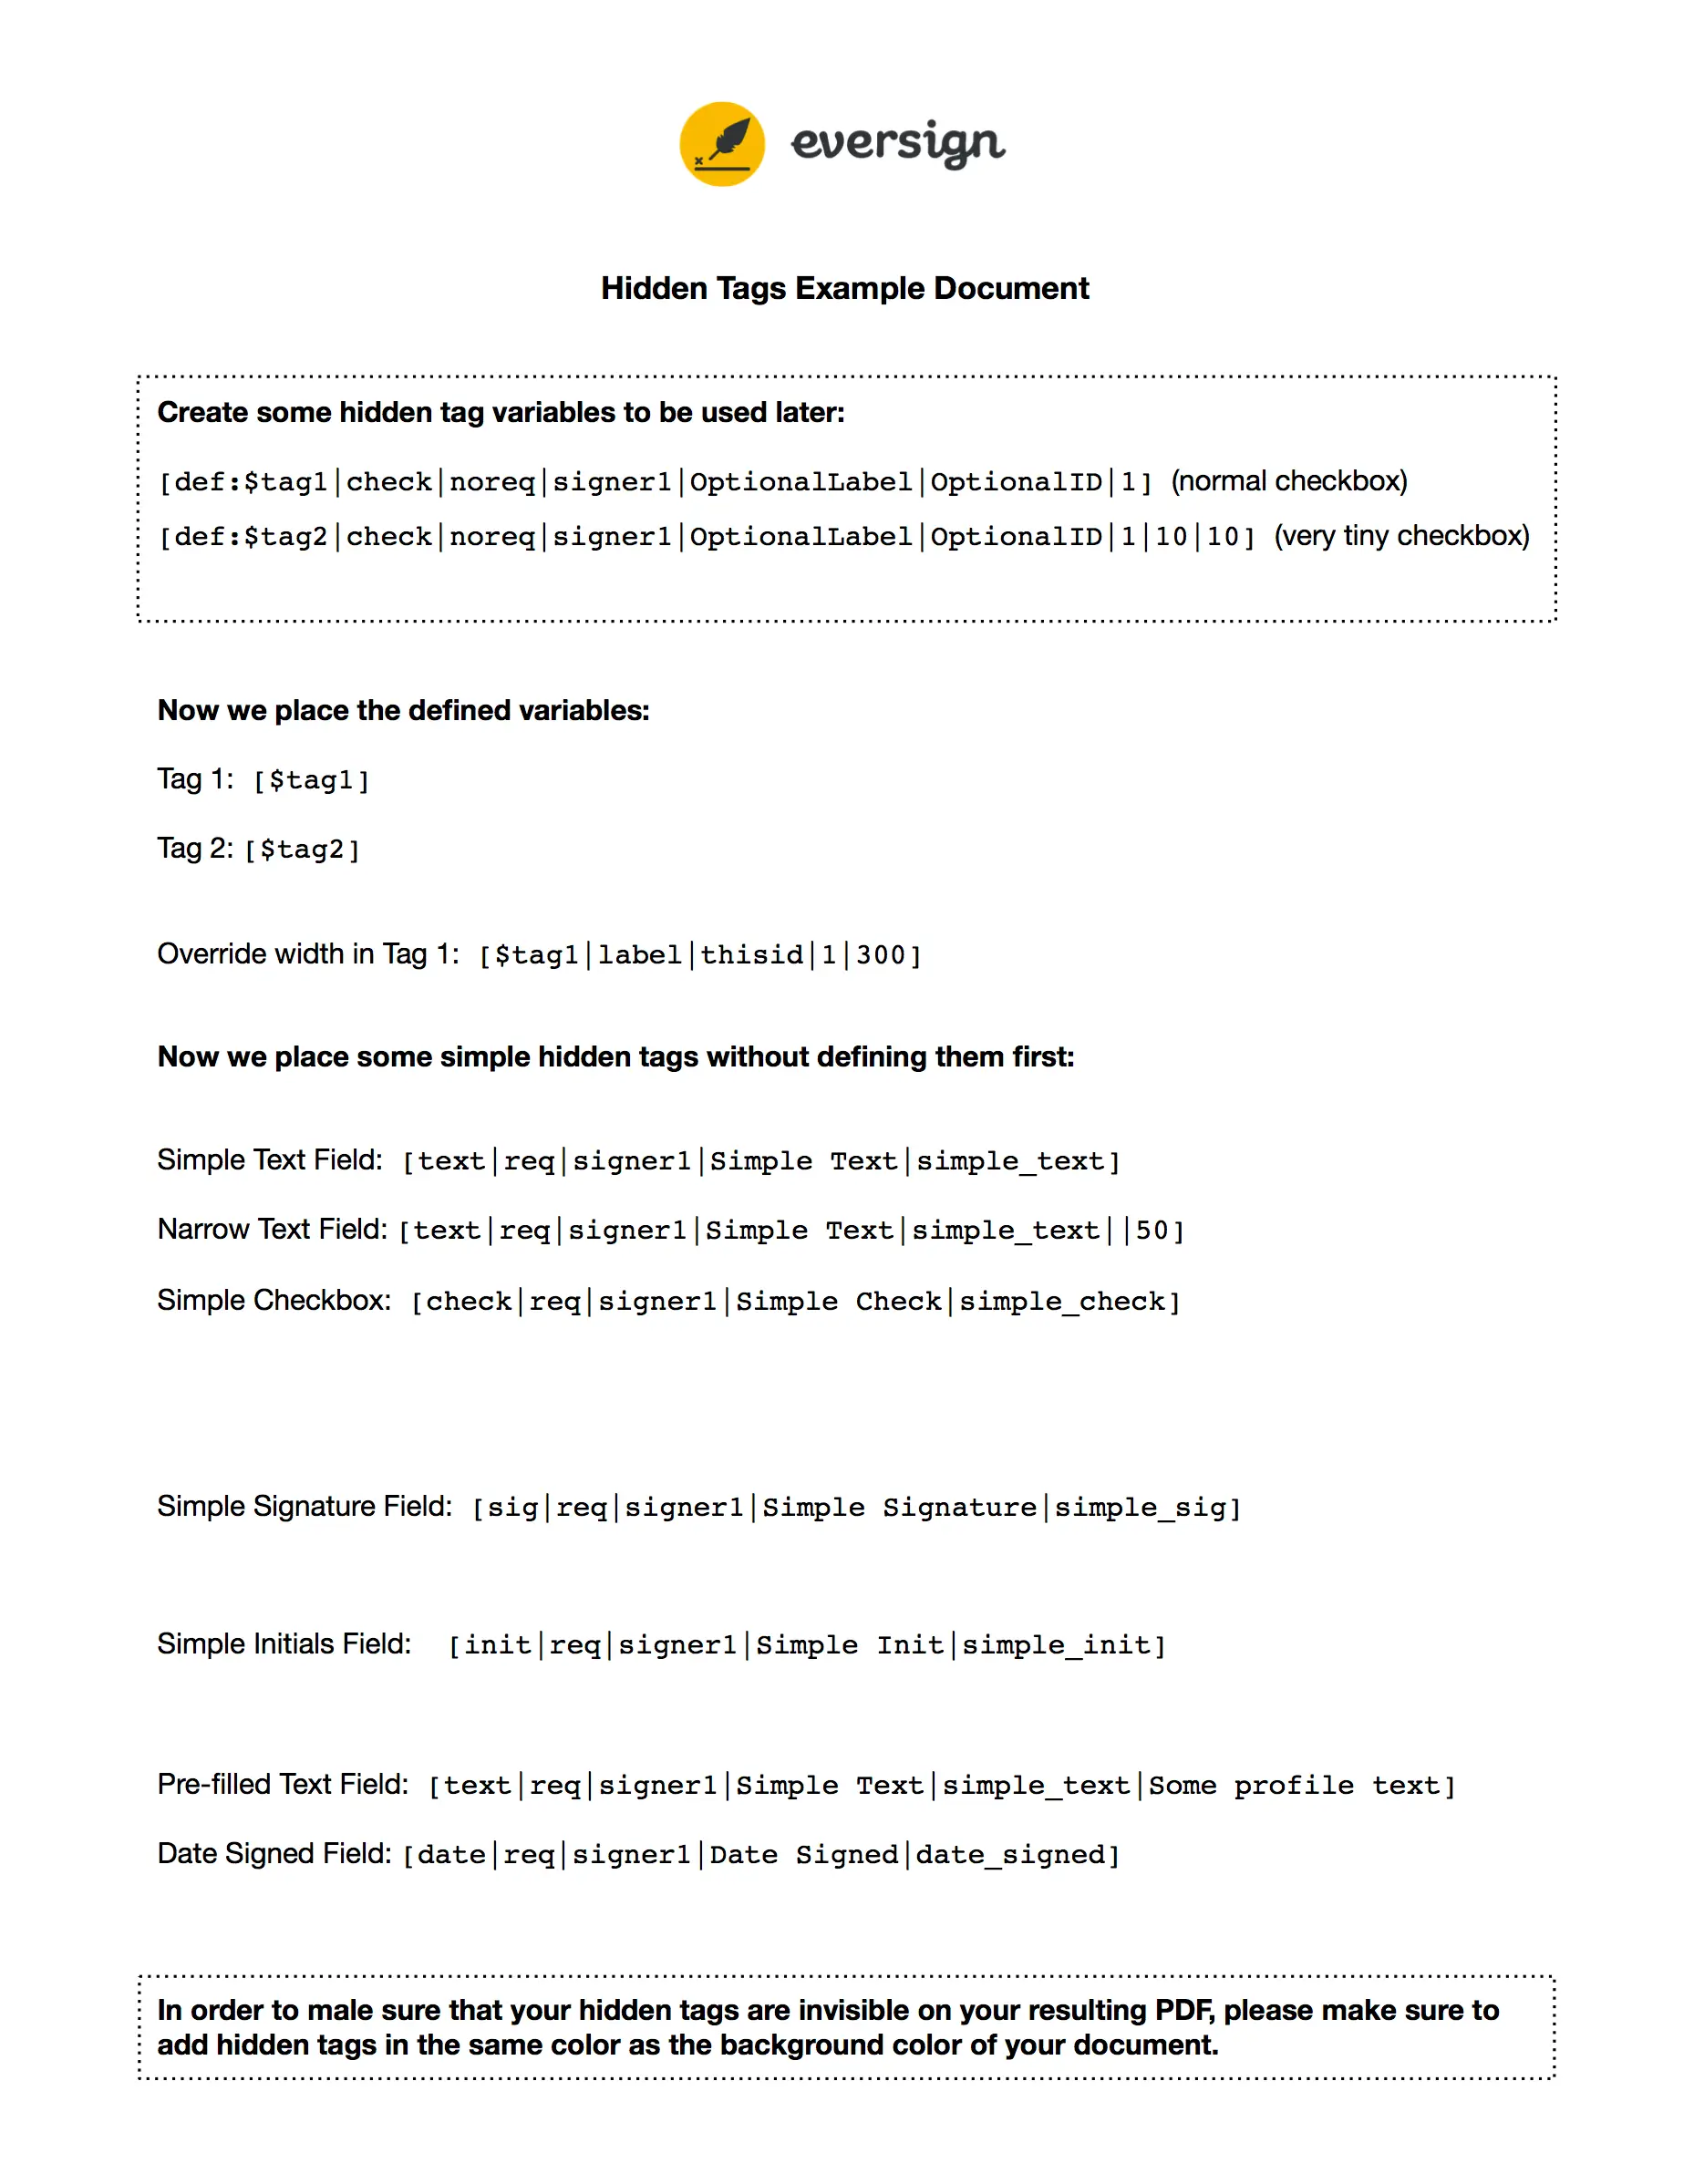
Example Document
Below you will see a document containing a number of examples. You can download this PDF here