%202.svg)

Table of contents
Sign and send unlimited e-signatures with Xodo Sign.
We are happy to announce that our Signer Authentication feature is now enabled for our eSignature API users as well.
Signer Authentication via SMS is an option you can set for each signer of a document, requiring them to use an SMS code they receive to their mobile phone in order to gain access to the document.
Signer Authentication adds an extra level of assurance that the documents you are sending for signature are only accessed by the intended person.
What specific improvements did we make?
We added two optional attributes to the signer object:
The first attribute is signer_authentication_sms_enabled which indicates whether Signer Authentication should be enabled for the signer.
The second attribute, signer_authentication_phone_number, is used to enter the phone number to which SMS authorizations will be delivered. Details can be found here.
Additionally, we extended our Error messages model with new error messages. New error messages help developers and integrators to better understand what went wrong if they did not provide correct data or if an issue occurred during the signing process.
For example, our API customers will get notified if:
- the phone number they entered for the signer is not in the supported format
- the Signer Authentication feature is disabled for that specific account for any reason
- the Signer Authentication Overage is not allowed for that specific account
You can find more information about error messages here.
Additional technical details and concerns
Xodo Sign also supports PIN verification however, combining PIN verification and Signer Authentication for the same signer is not supported and will return the following error if attempted:
signer_authentication_combined_with_pin_not_supported
The following example shows how to prepare a request for the Xodo Sign eSignature API, enabling Signer Authentication for one out of 2 signers:
{
  "sandbox": 0,
  "is_draft": 0,
  "embedded": 0,
  "title": "Document that needs to be securely signed",
  "message": "Please sign this document",
  "use_signer_order": 1,
  "reminders": 1,
  "require_all_signers": 1,
  "embedded_signing_enabled": 0,
  "flexible_signing": 0,
  "use_hidden_tags": 0,
  "files": [
    {
      "file_id": "44af8c98cf49422b8828763415a90844",
      "name": "Lease"
    }
  ],
  "signers": [
    {
      "id": 1,
      "name": "First Signer",
      "email": "[email protected]",
      "order": 1,
      "message": "For this signer, Signer Authentication is Enabled",
      "signer_authentication_sms_enabled": 1,
      "signer_authentication_phone_number": "+43677123132123"
    },
    {
      "id": 2,
      "name": "Second Signer",
      "email": "[email protected]",
      "order": 2,
      "message": "For this signer, we did not enable Signer Authentication"
    }
  ]
}
curl 'https://api.eversign.com/document?access_key={{access_key}}&business_id={{business_id}}' \
--request POST \
--location \
--header 'Content-Type: application/json' \
--data-raw @./document.json
As a response, you'll receive a common document structure, extended with signer authentication fields:
{
  "document_hash": "29ca...8640",
  "requester_email": "[email protected]",
  "custom_requester_name": "",
  "custom_requester_email": "",
  "is_draft": 0,
  "is_template": 0,
  "is_completed": 0,
  "is_archived": 0,
  "is_deleted": 0,
  "is_trashed": 0,
  "is_cancelled": 0,
  "is_expired": 0,
  "embedded": 0,
  "in_person": 0,
  "embedded_signing_enabled": 0,
  "flexible_signing": 0,
  "permission": "",
  "template_id": "",
  "title": "Document that needs to be securely signed",
  "subject": "",
  "message": "Please sign this document",
  "use_signer_order": 1,
  "reminders": 1,
  "require_all_signers": 1,
  "redirect": "",
  "redirect_decline": "",
  "client": "eversign_api",
  "created": 1631781677,
  "completed": "",
  "expires": 1639557677,
  "files": [
    {
      "name": "Lease",
      "file_id": "44af8c...90844",
      "pages": 1
    }
  ],
  "signers": [
    {
      "id": 1,
      "name": "First Signer",
      "email": "[email protected]",
      "role": "",
      "order": 1,
      "pin": "",
      "signer_authentication_sms_enabled": 1,
      "signer_authentication_phone_number": "+43677123132123",
      "message": "For this signer, Signer Authentication is Enabled",
      "signed": 0,
      "signed_timestamp": "",
      "required": 0,
      "deliver_email": 1,
      "language": "en",
      "declined": 0,
      "removed": 0,
      "bounced": 0,
      "sent": 1,
      "viewed": 0,
      "status": "waiting_for_signature"
    },
    {
      "id": 2,
      "name": "Second Signer",
      "email": "[email protected]",
      "role": "",
      "order": 2,
      "pin": "",
      "signer_authentication_sms_enabled": 0,
      "signer_authentication_phone_number": "",
      "message": "For this signer, we did not enable Signer Authentication",
      "signed": 0,
      "signed_timestamp": "",
      "required": 0,
      "deliver_email": 1,
      "language": "en",
      "declined": 0,
      "removed": 0,
      "bounced": 0,
      "sent": 0,
      "viewed": 0,
      "status": "on_hold"
    }
  ],
  "recipients": [],
  "fields": [
    []
  ],
  "log": [
    {
      "event": "document_created",
      "signer": "",
      "timestamp": 1631781678
    },
    {
      "event": "signer_2fa_enabled",
      "signer": 1,
      "timestamp": 1631781678
    },
    {
      "event": "document_sent",
      "signer": 1,
      "timestamp": 1631781678
    },
    {
      "event": "document_sent",
      "signer": 2,
      "timestamp": 1631781678
    }
  ],
  "meta": []
}
Additionally, a new event log entry type has been added, with the information that signer authentication has been enabled (in this example, for one signer):
{
  "event": "signer_2fa_enabled",
  "signer": 1,
  "timestamp": 1631781678
}
The signer's experience
The signer receives the document for signature via e-mail.
On opening the document, the interface is blurred and the access restricted.
(the same way as when using the Signer PIN feature).
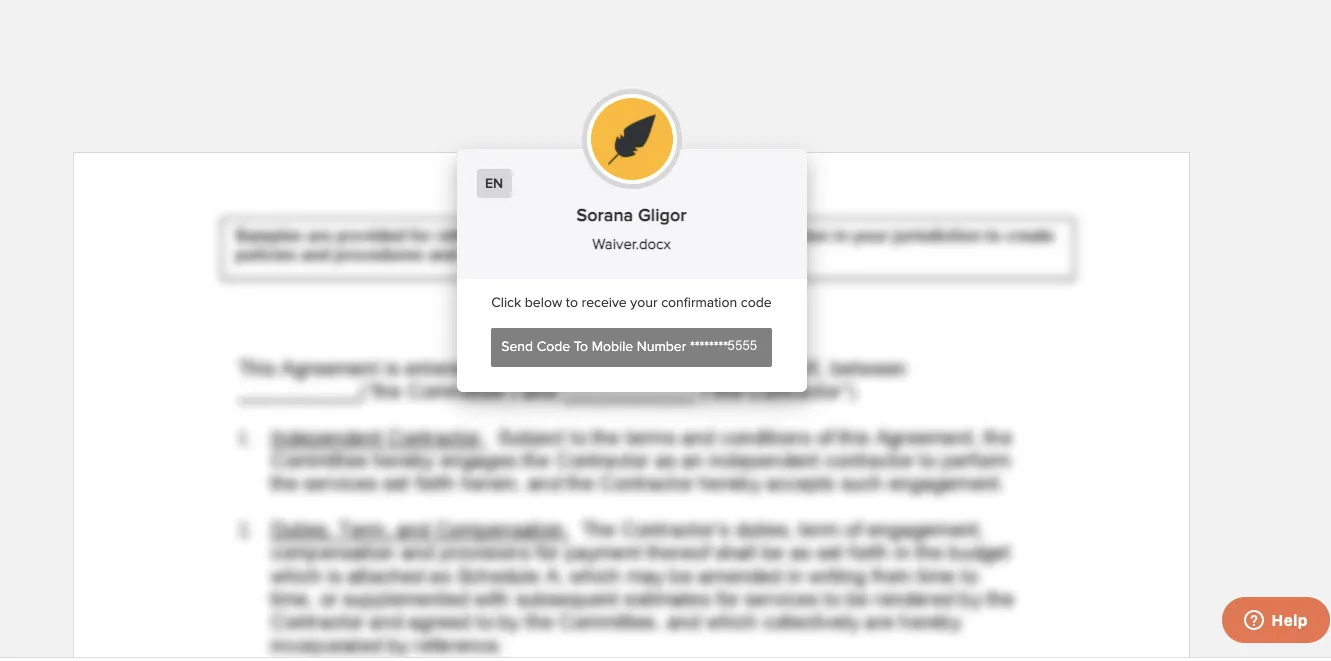
A pop-up window gives you the option to click to receive your confirmation code via SMS text to unlock the document.
Click the Send Code to Mobile Number ... button in the pop-up window.
You will receive an SMS text message shortly after. (typical delay 5-10 seconds)
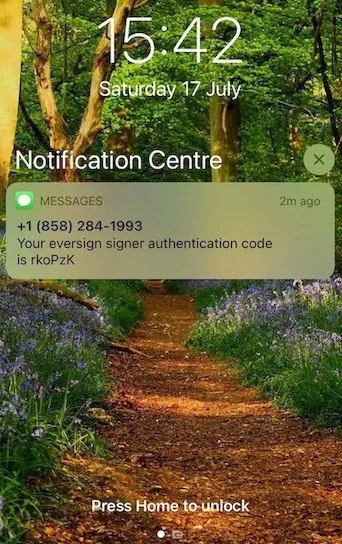
The sender of the SMS text might not appear as Xodo Sign, but as a phone number or a name such as "SMS Info".
Enter the received code in the pop-up window and click on Authenticate.

If you entered the correct code, you now have access to the document and can sign it.
If you have any questions about our Signer Authentication for API users which are not covered in this blog post or in our help center article, don't hesitate to contact our friendly customer service team.

.svg)